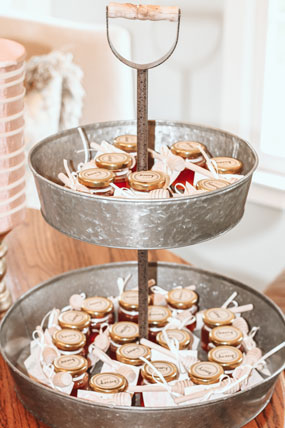
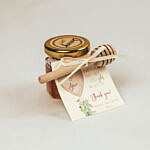
I threw my baby sister a baby shower, and I think the favors may have been my favorite part of the whole shindig (besides the fact that she was going to be bringing life into the world and stuff.) I scoured the internet for a painfully long time in my attempt to find inspiration for the perfect party favor. I wanted something that I could create myself, and it needed to be something that people would actually use. Of course, it also had to fit the vintage floral theme I was creating for the party.
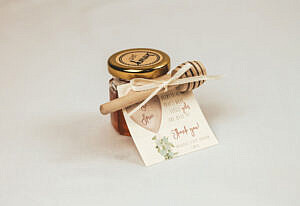
Finally, during one of my internet searches while doing cardio (how I ever completed a cardio session without a smartphone, I will never understand), I spotted some itty bitty honey pots on Amazon as a ‘suggested’ item during my search mission. Mini honey jars?? Perfection! Of course, we needed tiny honey stirrers to go with the tiny pots. I chose Mike’s Hot Honey as the product of choice because, you know, ‘sugar and spice and everything nice.’ A few print edits on some customizable gift tags, some ivory ribbon, and hand written labels later–the favors were born.
TOOLS OF THE TRADE
❖
◇ small glass jars
◇ miniature honey dipper sticks
◇ honey
◇ 1/8″ satin ribbon
◇ favor tags
◇ card stock (for printing your tags)
◇ scissors
◇ hole punch
INSTRUCTIONS
❖
{ 1 }
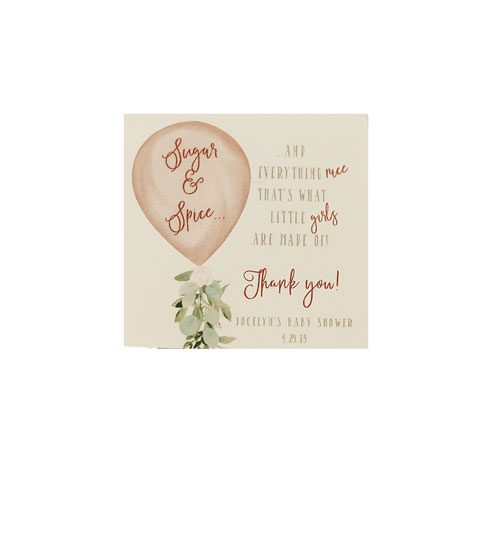
Select and customize your printable gift tags. I found these on Etsy, and they turned out great! There are tons of options on Etsy! Print and cut the appropriate amount needed for your favors.
{ 2 }
Using a hole punch, make two holes side by side at the top/middle of the gift tags. This is what you will thread the ribbon through to attach them to the jars.
{ 3 }
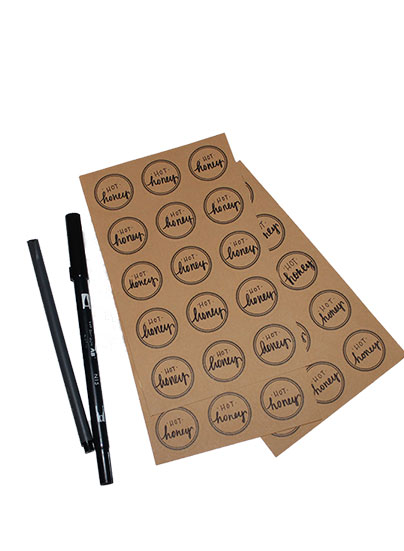
If you purchased miniature glass jars that come with labels, write your labels on all of the stickers ahead of time. I wrote ‘hot honey’ on my labels. Stick the labels on all of the jar tops so you don’t have to do this later.
{ 4 }
You will need to figure out how long your ribbon pieces should be for each favor. Pull some ribbon off of your spool and wrap it around the glass jar to get an idea of how much length you need. This will depend on how large you want your bows to be. You need enough length to wrap around the jar and tie a bow. Once you decide how long your ribbon should be, cut enough ribbon pieces for each jar. This will save you time when you start to assemble the favors.
{ 5 }
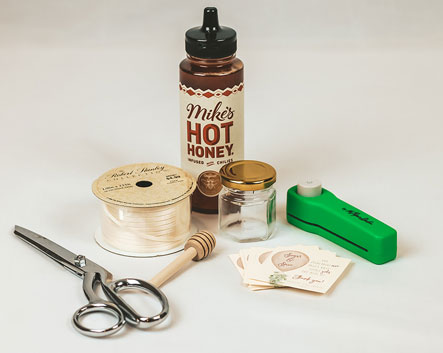
Gather your supplies together onto your work space so that you can fashion your ‘assembly line.’
I suggest attaching your gift tags to your jars before you fill them with honey. This is less…sticky.
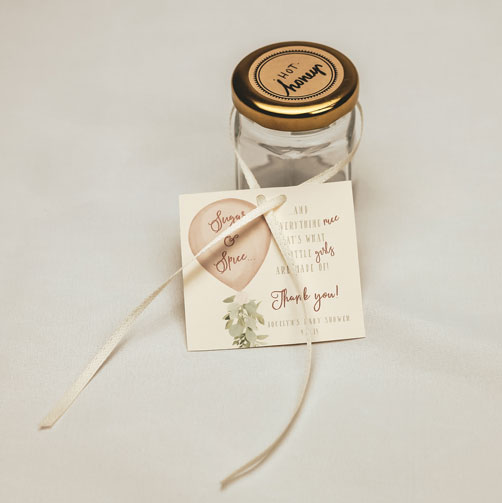
{ 6 }
Take a piece of ribbon and wrap it around the space just under where the cap threads onto the top of the jar. Thread one end of the ribbon through one hole on the gift tag. Thread the other end of the ribbon through the other hole. Tie the ribbon ends together into a knot.
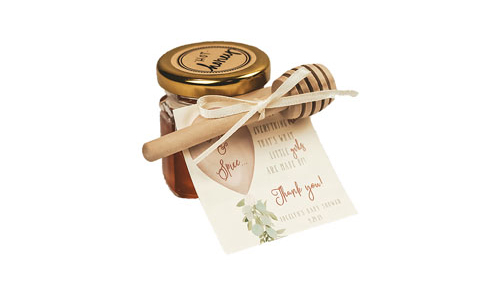
{ 7 }
Take a honey dipper stick and, using the ribbon ends, tie a bow around the stick to fasten it to the jar.
{ 8 }
Fill your jars about 3/4 full with honey, and screw your lids on tight.
